#3D
About Me
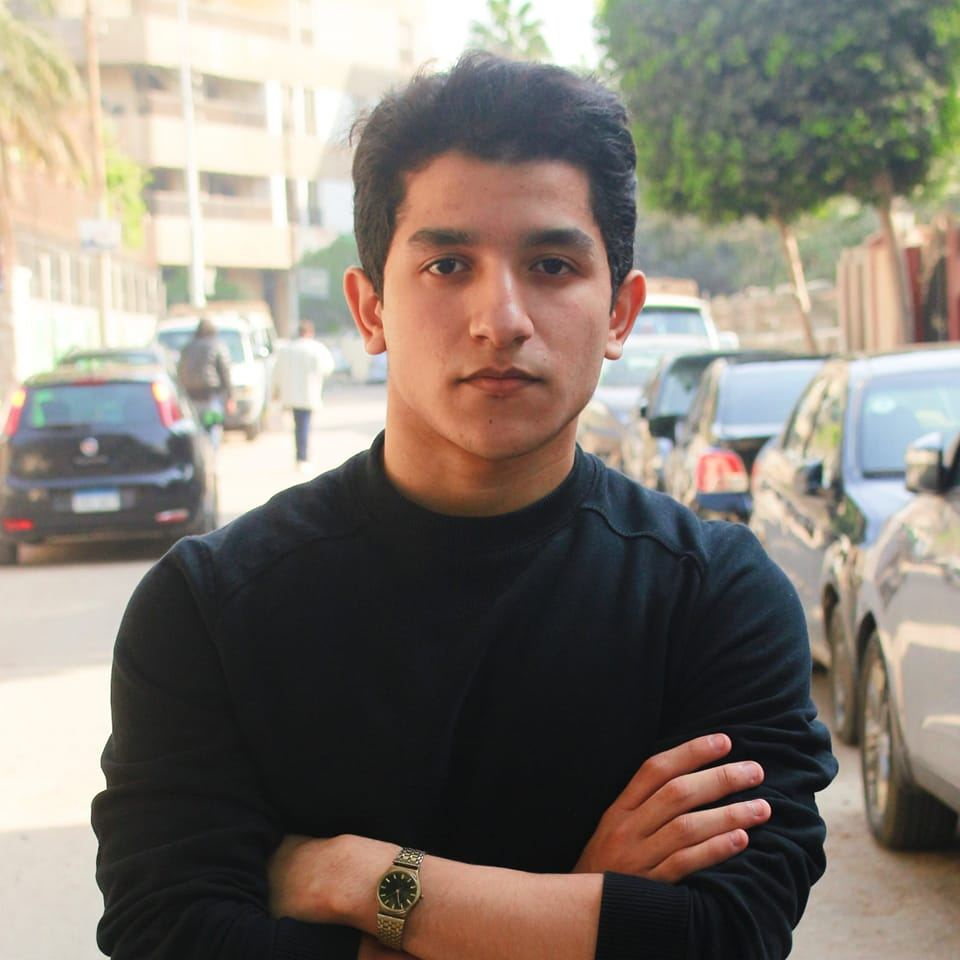
Hey! I’m Nour-Eldin Ahmed, a 22-year-old Egyptian 3D artist. It all kicked off when I was 14. You could say it began with a bit of sibling inspiration—my big brother was into game development, and there I was, mostly just into playing them. Seeing him work made me realize I didn’t want to just play games; I wanted to make something significant for myself too.
I initially gave game creation a shot, fiddling around with Game Maker Studio. But, if I’m honest, it didn’t quite capture my passion. So, I started exploring what else went into making the kind of video games I loved. That’s when I stumbled upon 3D art, and let me tell you, it was like a whole new world opened up. There is something mesmerizing about watching artists shape life out of nothing, and I was hooked.
I dived headfirst into learning ZBrush and dedicated months to it. But, like many journeys, it wasn’t smooth sailing. As a young learner, I struggled without a clear path forward, and my early attempts were less than stellar. This led to a period of exploration—I dabbled in UI/UX design, app development, graphic design, and Game Development using Unity and Tried Unreal Engine too. It was a quest to find where my true passion lay.
It wasn’t until I turned 18 that the pieces clicked. I circled back to 3D art, equipped with a better approach and a fresh mindset. By reaching out for guidance and learning from other artists, I’ve built a career as a self-taught 3D Artist with over four years of experience.
What I love about being a 3D artist is the magic of creation—taking a sphere and sculpting it into a character with its own story and personality. And the best part? Seeing those characters come to life in a game, moving and interacting as if they were real. For me, that’s the true reward of this journey.
Leon
Introduction: I wanted to improve my skills in creating game characters, so I began searching for one to practice with. I desired a character that would truly challenge me. After some searching, I stumbled upon Leon Kennedy. His cool appearance and unique outfits immediately caught my eye. He seemed like the perfect choice for my project, especially since I was aiming to practice creating clothes and working on hard surfaces. I was really excited about his design and couldn't wait to start making a 3D model of him
Reference Gathering: Gathering references was surprisingly easy, thanks to Resident Evil 2. The game provided a showcase of 3D models in-game, which allowed me to take numerous screenshots from various angles and with different hairstyles. Additionally, I sought out references from other artists' 3D models. While they may not have been perfect, they still proved invaluable in capturing the key features of Leon's face.
Tools and Software:
Zbrush – For sculpting and placing hair cards
Maya – For retopology and UV
Marvelous Designer – for Making Clothes
Marmoset –Baking and testing in real-time Render
Substance Painter – For Texturing
Fibershop – For making hair cards texture
Unreal Engine – For Final Render
Blender – For making quick rig
Photoshop – For editing Textures
Workflow:
- Blocking out Body
- Making Clothes
- Modeling Gear
- High poly
- Retopology
- UV unwrapping
- Baking
- Texturing
- Making Hair cards
- Rigging
- Rendering
Blocking out Body
For making full-body characters like that I usually use Daz Studio Genesis 8 Base mesh as it has plenty of options to change the proportions and the shape of the body.
After making a quick Base mesh I sent it to Zbrush to sculpt the head and adding sculpted head, doesn’t have to be good at all just to make me imagine how the character will look like when I make the clothes in marvelous designer.
Making Fabric
I decided to practice making the boots in Marvelous Designer instead of blocking it out in Maya.


Then I moved to the clothes.

Some parts like the knee and elbow armors I did it in marvelous designer to give me the effect of stretched garments below them, but I removed them after and modeled them in Maya to have a cleaner shape,
After finishing the clothes in Marvelous Designer I wanted to retopology it so it would be easier to sculpt on despite that I am gonna retopology it again after the whole character is done
Clothes Retopology is kind of Complicated to make manually as auto retopology tools like Zremesher wouldn’t give the best result, so I followed a combined workflow from Flippednormals and Outgang channels
https://www.youtube.com/watch?v=VFAfqW0Zlqk&t=419s
https://www.youtube.com/watch?v=o_Q-N8CoyCU&t=511s

I Started by making simple uv for the garments in marvelous designer as I will use projection in maya and I will explain why.
Then I retopologized it (No need to be perfect as it will be retopologzied again) and made sure that the low-poly one has the exact same UV of high poly one.
After that I exporting The High and Low poly to Maya with this options (Make Sure Unified UV Coordinates is Checked) 
Then I started Merging the low poly Vertices in Seams area so I can subdivide it with no issue.
Then I sub divided the low poly mesh and used projection with uv to project the details for highpoly to lowpoly one.

Then I exported the lowpoly to Zbrush and I used a usefull trick from outgang video that when adding thickness to mesh use the number of loops = to the 2^N which N = number of subdivisions u did in maya
And this trick is used so you can reconstruct to lower subdivision in zbrush.
Having multiple SubDiv levels will help if u want to add more wrinkles and fold in the fabric
Modeling Gear
I Gathered some reference of his gear from the 3d show case in resident evil game and from an amazing artist work “Alexander Gonzalez” who made a version of Leon for Dead by Daylight Game, he provided Marmoset Viewer in his Artwork in Artstation.


I did low and high poly Version for each assets so it will be ready in baking phase
High poly
Everything now is ready to start finishing sculpting and modeling phase, I took my time sculpting the head and adding more details for the clothes and gear.


Retopology
After finalizing the high poly mesh I decimated it and sent it to Maya for retopology,
I decided to retopology the whole character into only 1 mesh, only the gears are split,
Why I chose that is because it will be easier to rig, but it will also be harder to retopologize. So, it will be a nice challenge for me to enhance my retopologizing skills.
Each color represent a single mesh.


UV Unwrapping
I used maya for UV unwrapping phase, I made 3 4K Textures Sets, The 3 sets are Head, Clothes and Gears.
Baking
For Baking I used Marmoset as it will give me the option to make separate Baking Cage for each Asset
So I renamed each part with low and high suffix and imported them into marmoset for baking
And used photoshop for fixing some artifacts the was hard to fix in marmoset.
Texturing
I wanted to render and post the boots in a separate post so I started texturing it in substance and rendered it in Iray.

I added tiny details in Substance painter such as stitches and leather texture
Then I Started with the character and projected the boots textures to it as I used different uv at first
I added Bloody effect for giving more interesting look.

Haircards
For making hair cards Textures I used fibershop as it gives really good results and has much quicker workflow than xgen workflow
For Cards Placement I used Zbrush with Transform Bend Curve Modifier.
It was a back and forth process , I kept testing the hair cards in marmoset while working in Zbrush.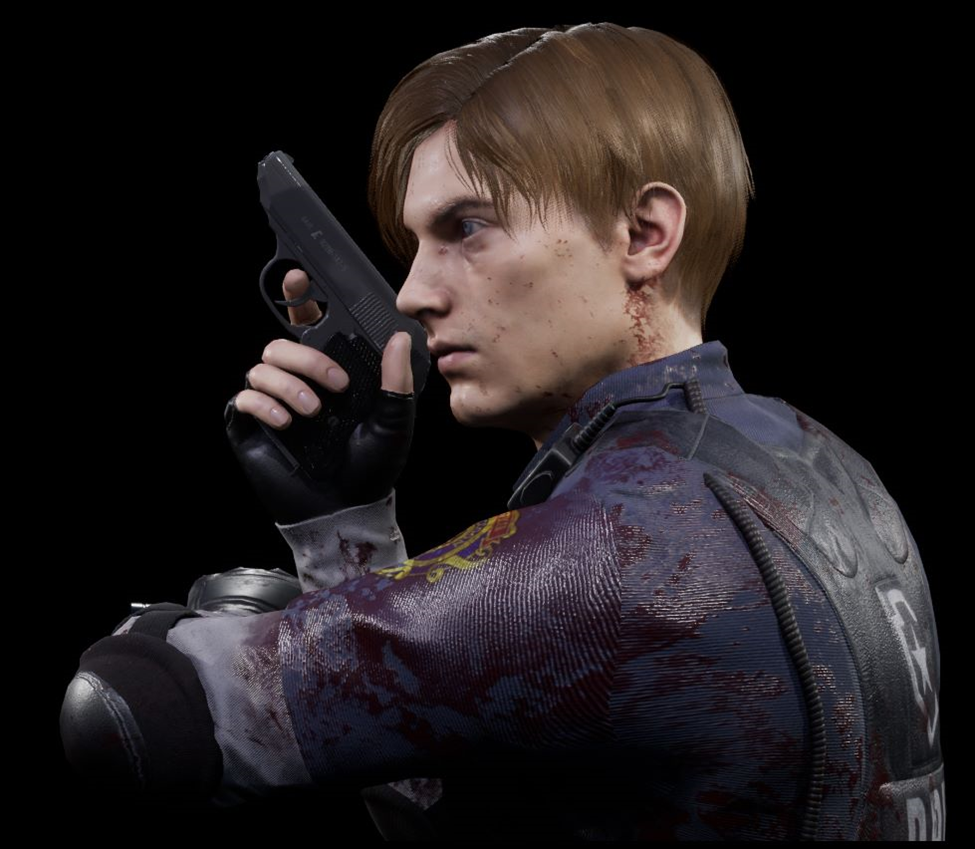
Rigging
I used Basic Human rig in blender , parented the gadgets to the body and Posed him in his Famous pose.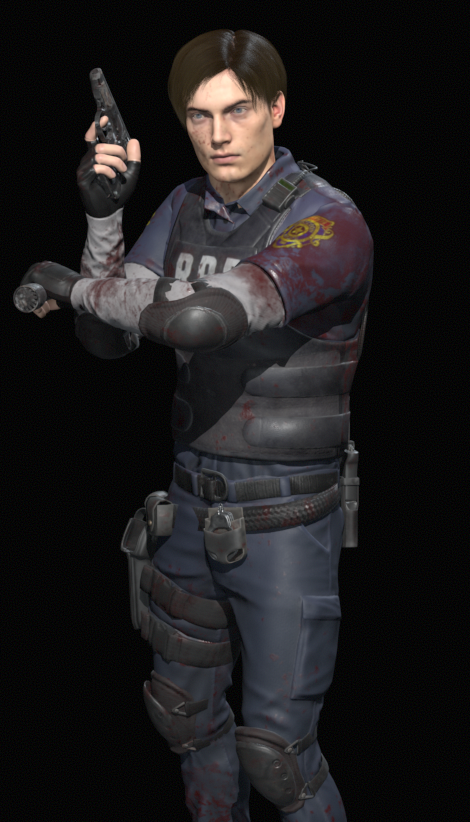
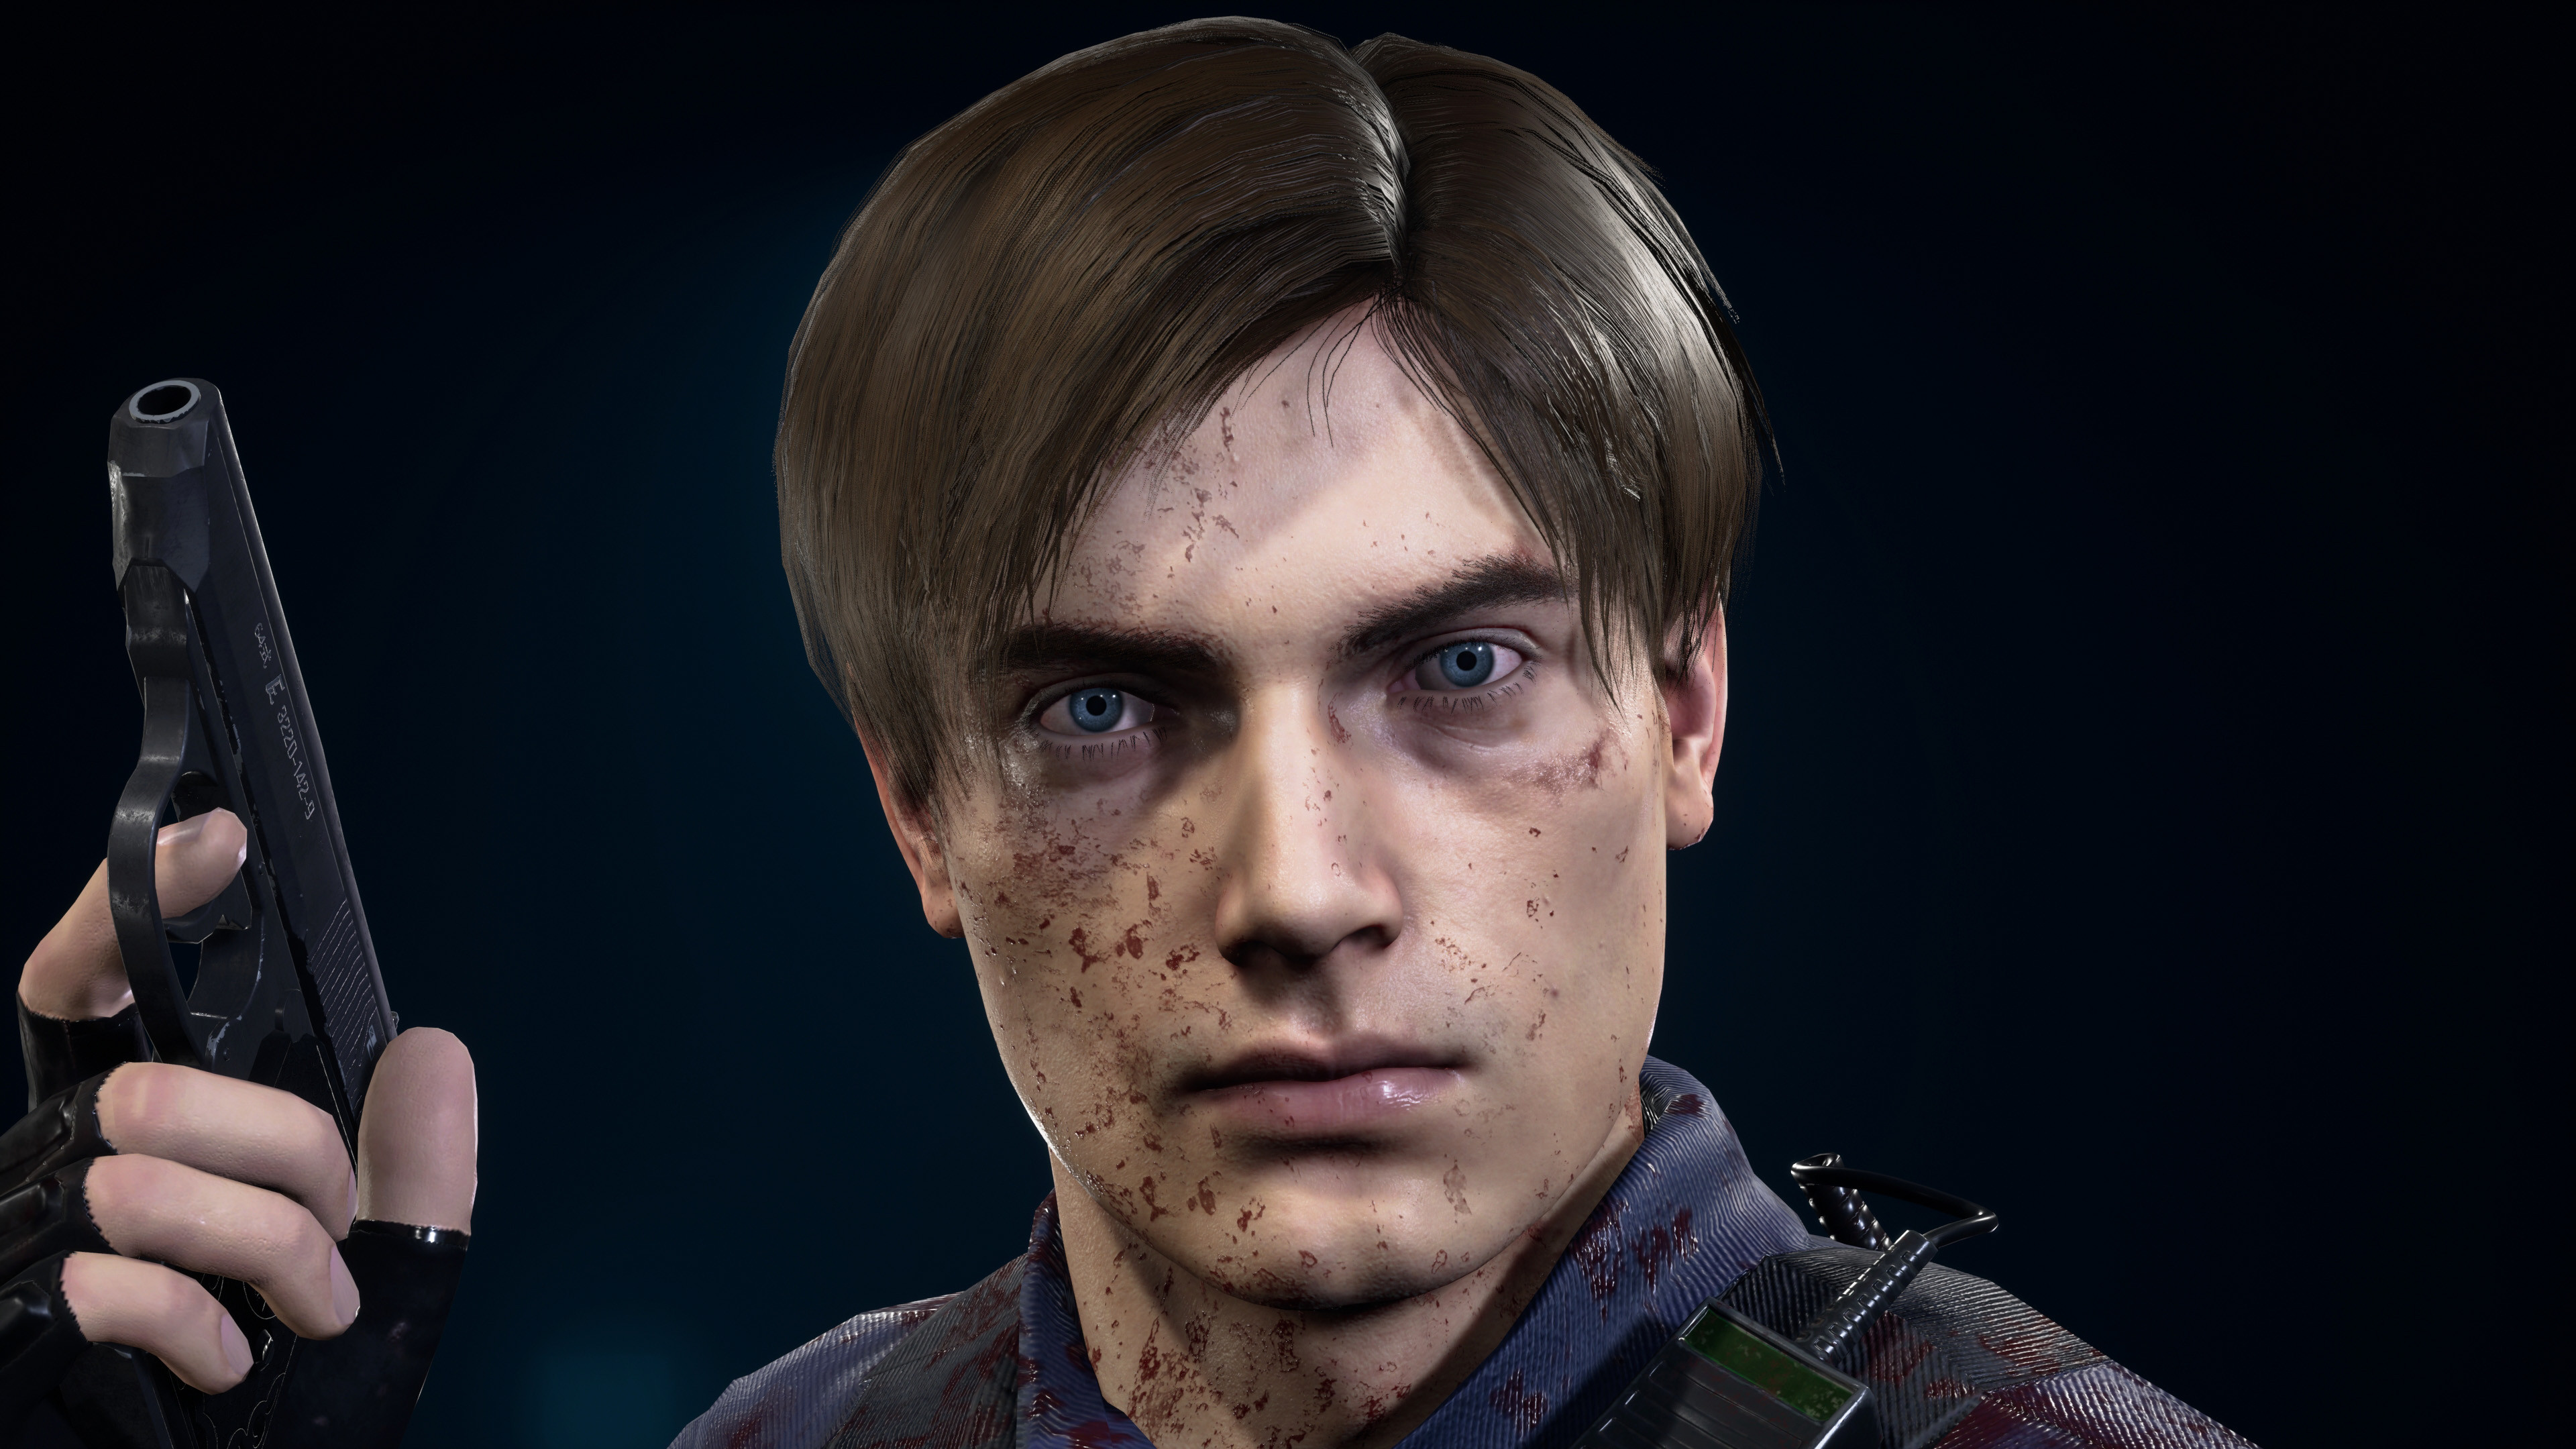
Rendering
Finally I have everything Ready for rendering , I imported everything in Unreal Engine and used Metahuman eyes
J Hill tutorial was very helpful for look-dev phase and using metahuman eyes in Unreal engine
https://www.youtube.com/watch?v=yqGlyhPXy5A
Then it was the time to finally Render it and here is the Final Result.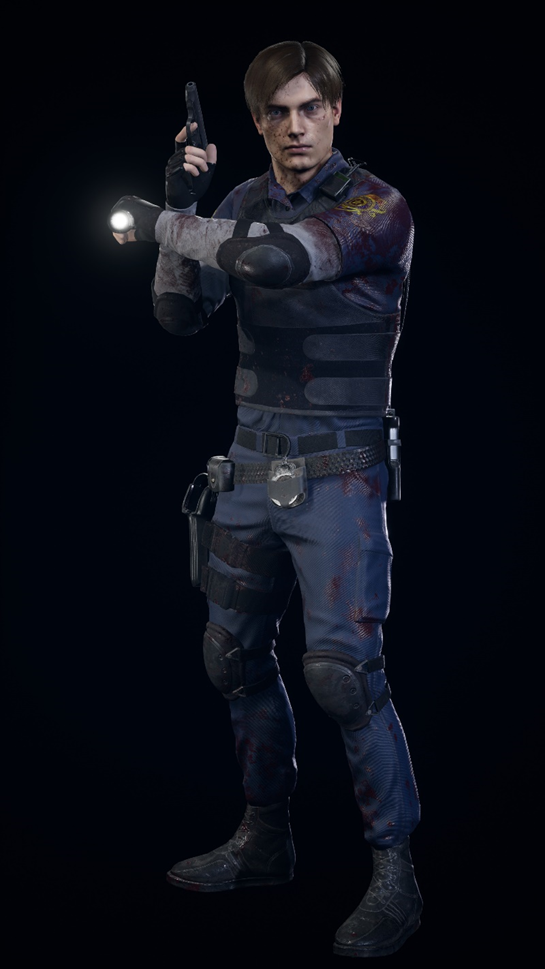
Artist: Nour-Eldin Ahmed